
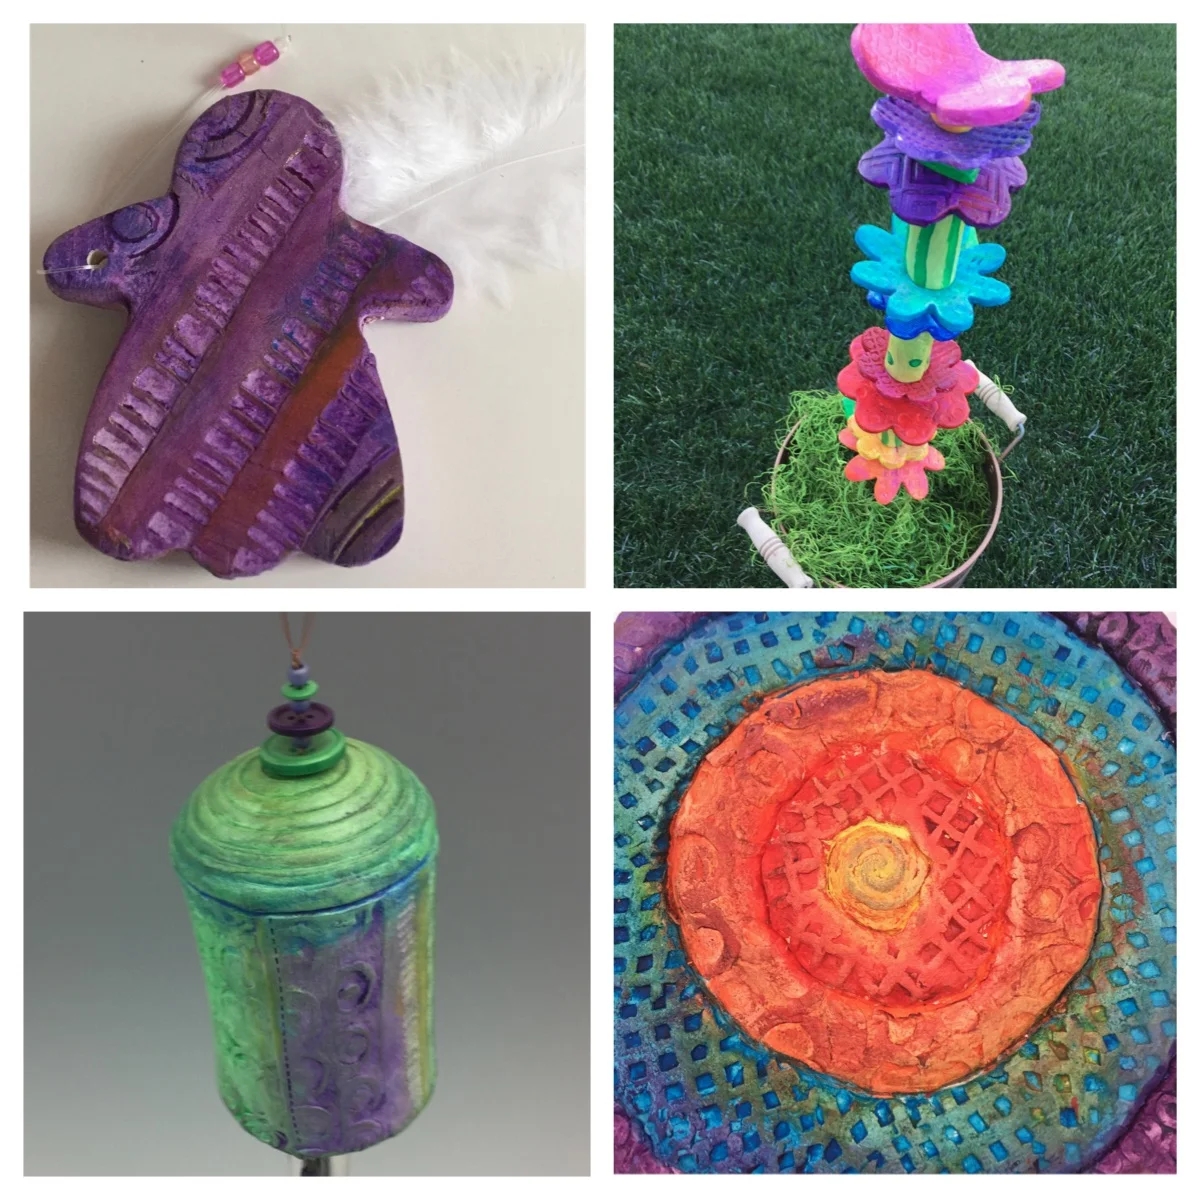
Clay and glaze go hand in hand. Usually, a finished piece does not feature one without the other. Glaze provides functionality to the clay as well as a decorative finish. Recently, I’ve been playing around with the finished surface of my textured clay minus glaze. It has given me a chance to play with and blend color. Here's how the process works:

I make a piece and then fire it once in the kiln to its normal bisque state (cone 04 for the pottery geeks out there). Next is when the fun begins. Instead of applying glaze or underglazes to add color and finish the piece, I use acrylic paints to decorate the surface.
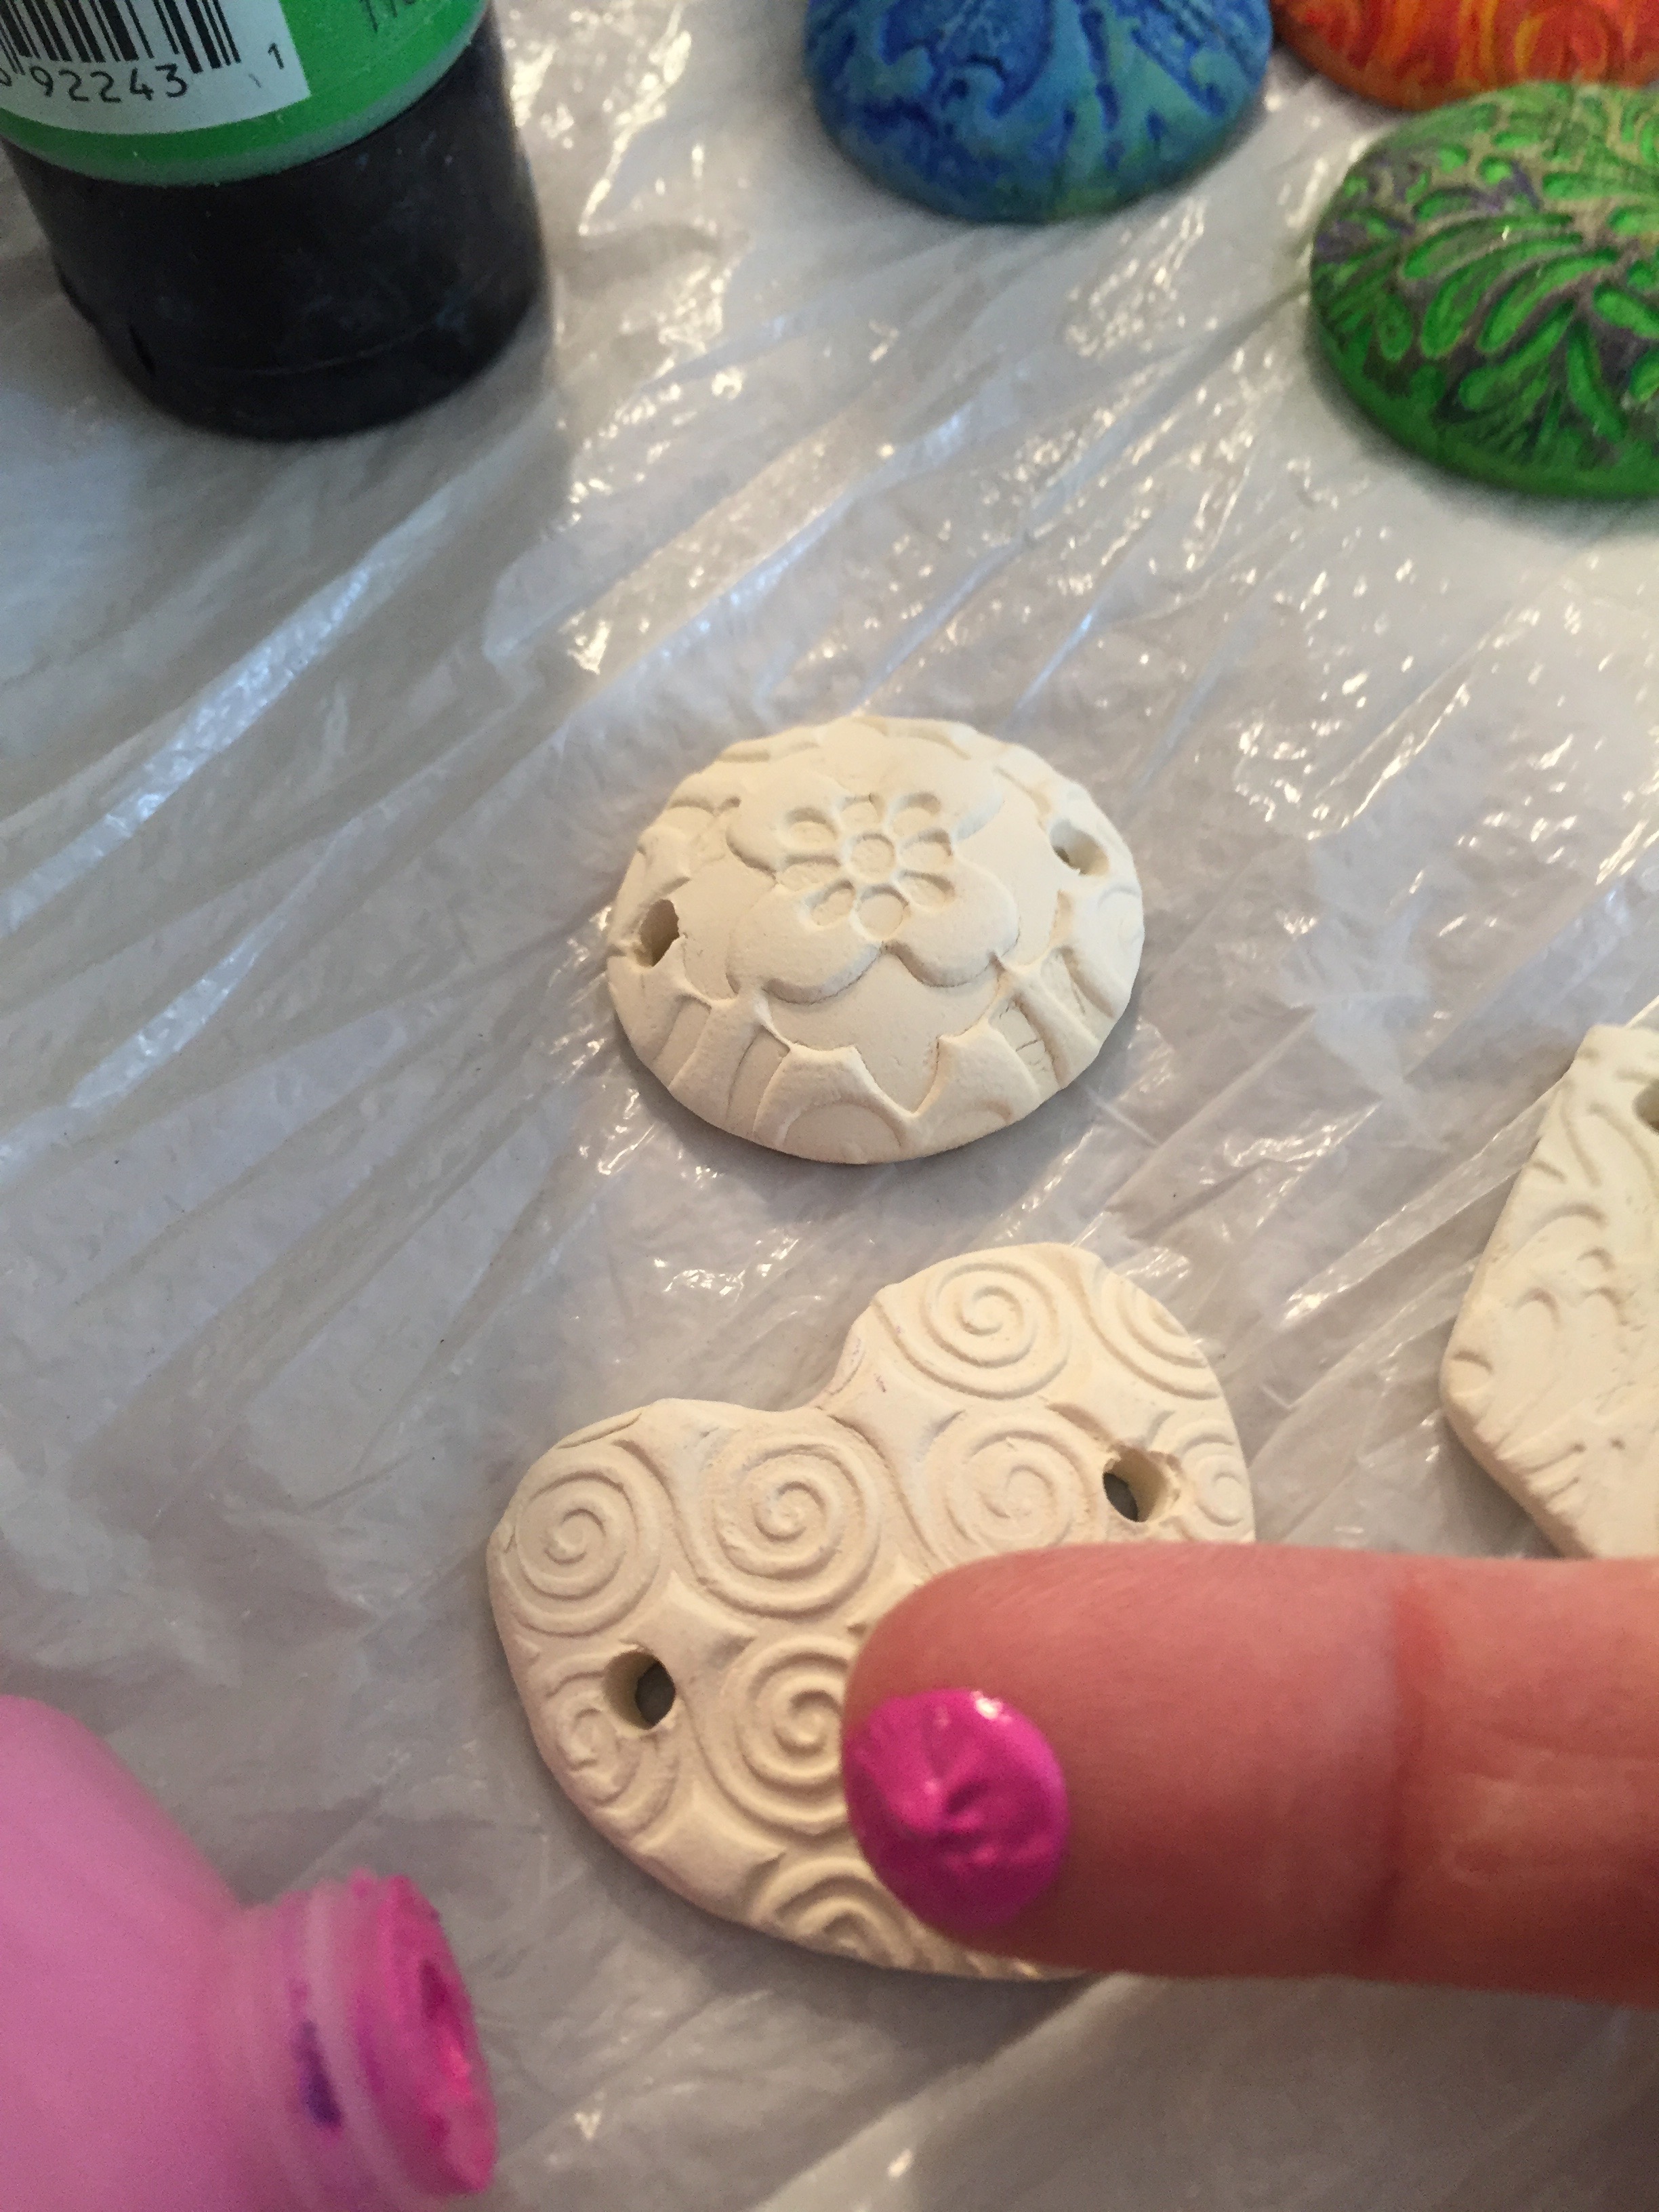
Sometimes I use a brush to apply the color, but I usually end up spreading the paint with my finger. It seems to be the perfect tool for blending and 'mashing' the acrylics into the nooks and crannies of the design. This method seems to work well with any raised texture on the surface of each piece.

After the first color is applied, I wipe the surface with a damp paper towel or sponge. This is where some of the magic starts to happen. Just as the pooling effect of glaze changes how the surface of a pot will look, the dark and light features of cleaning off some of the paint changes how the texture looks on these pieces.
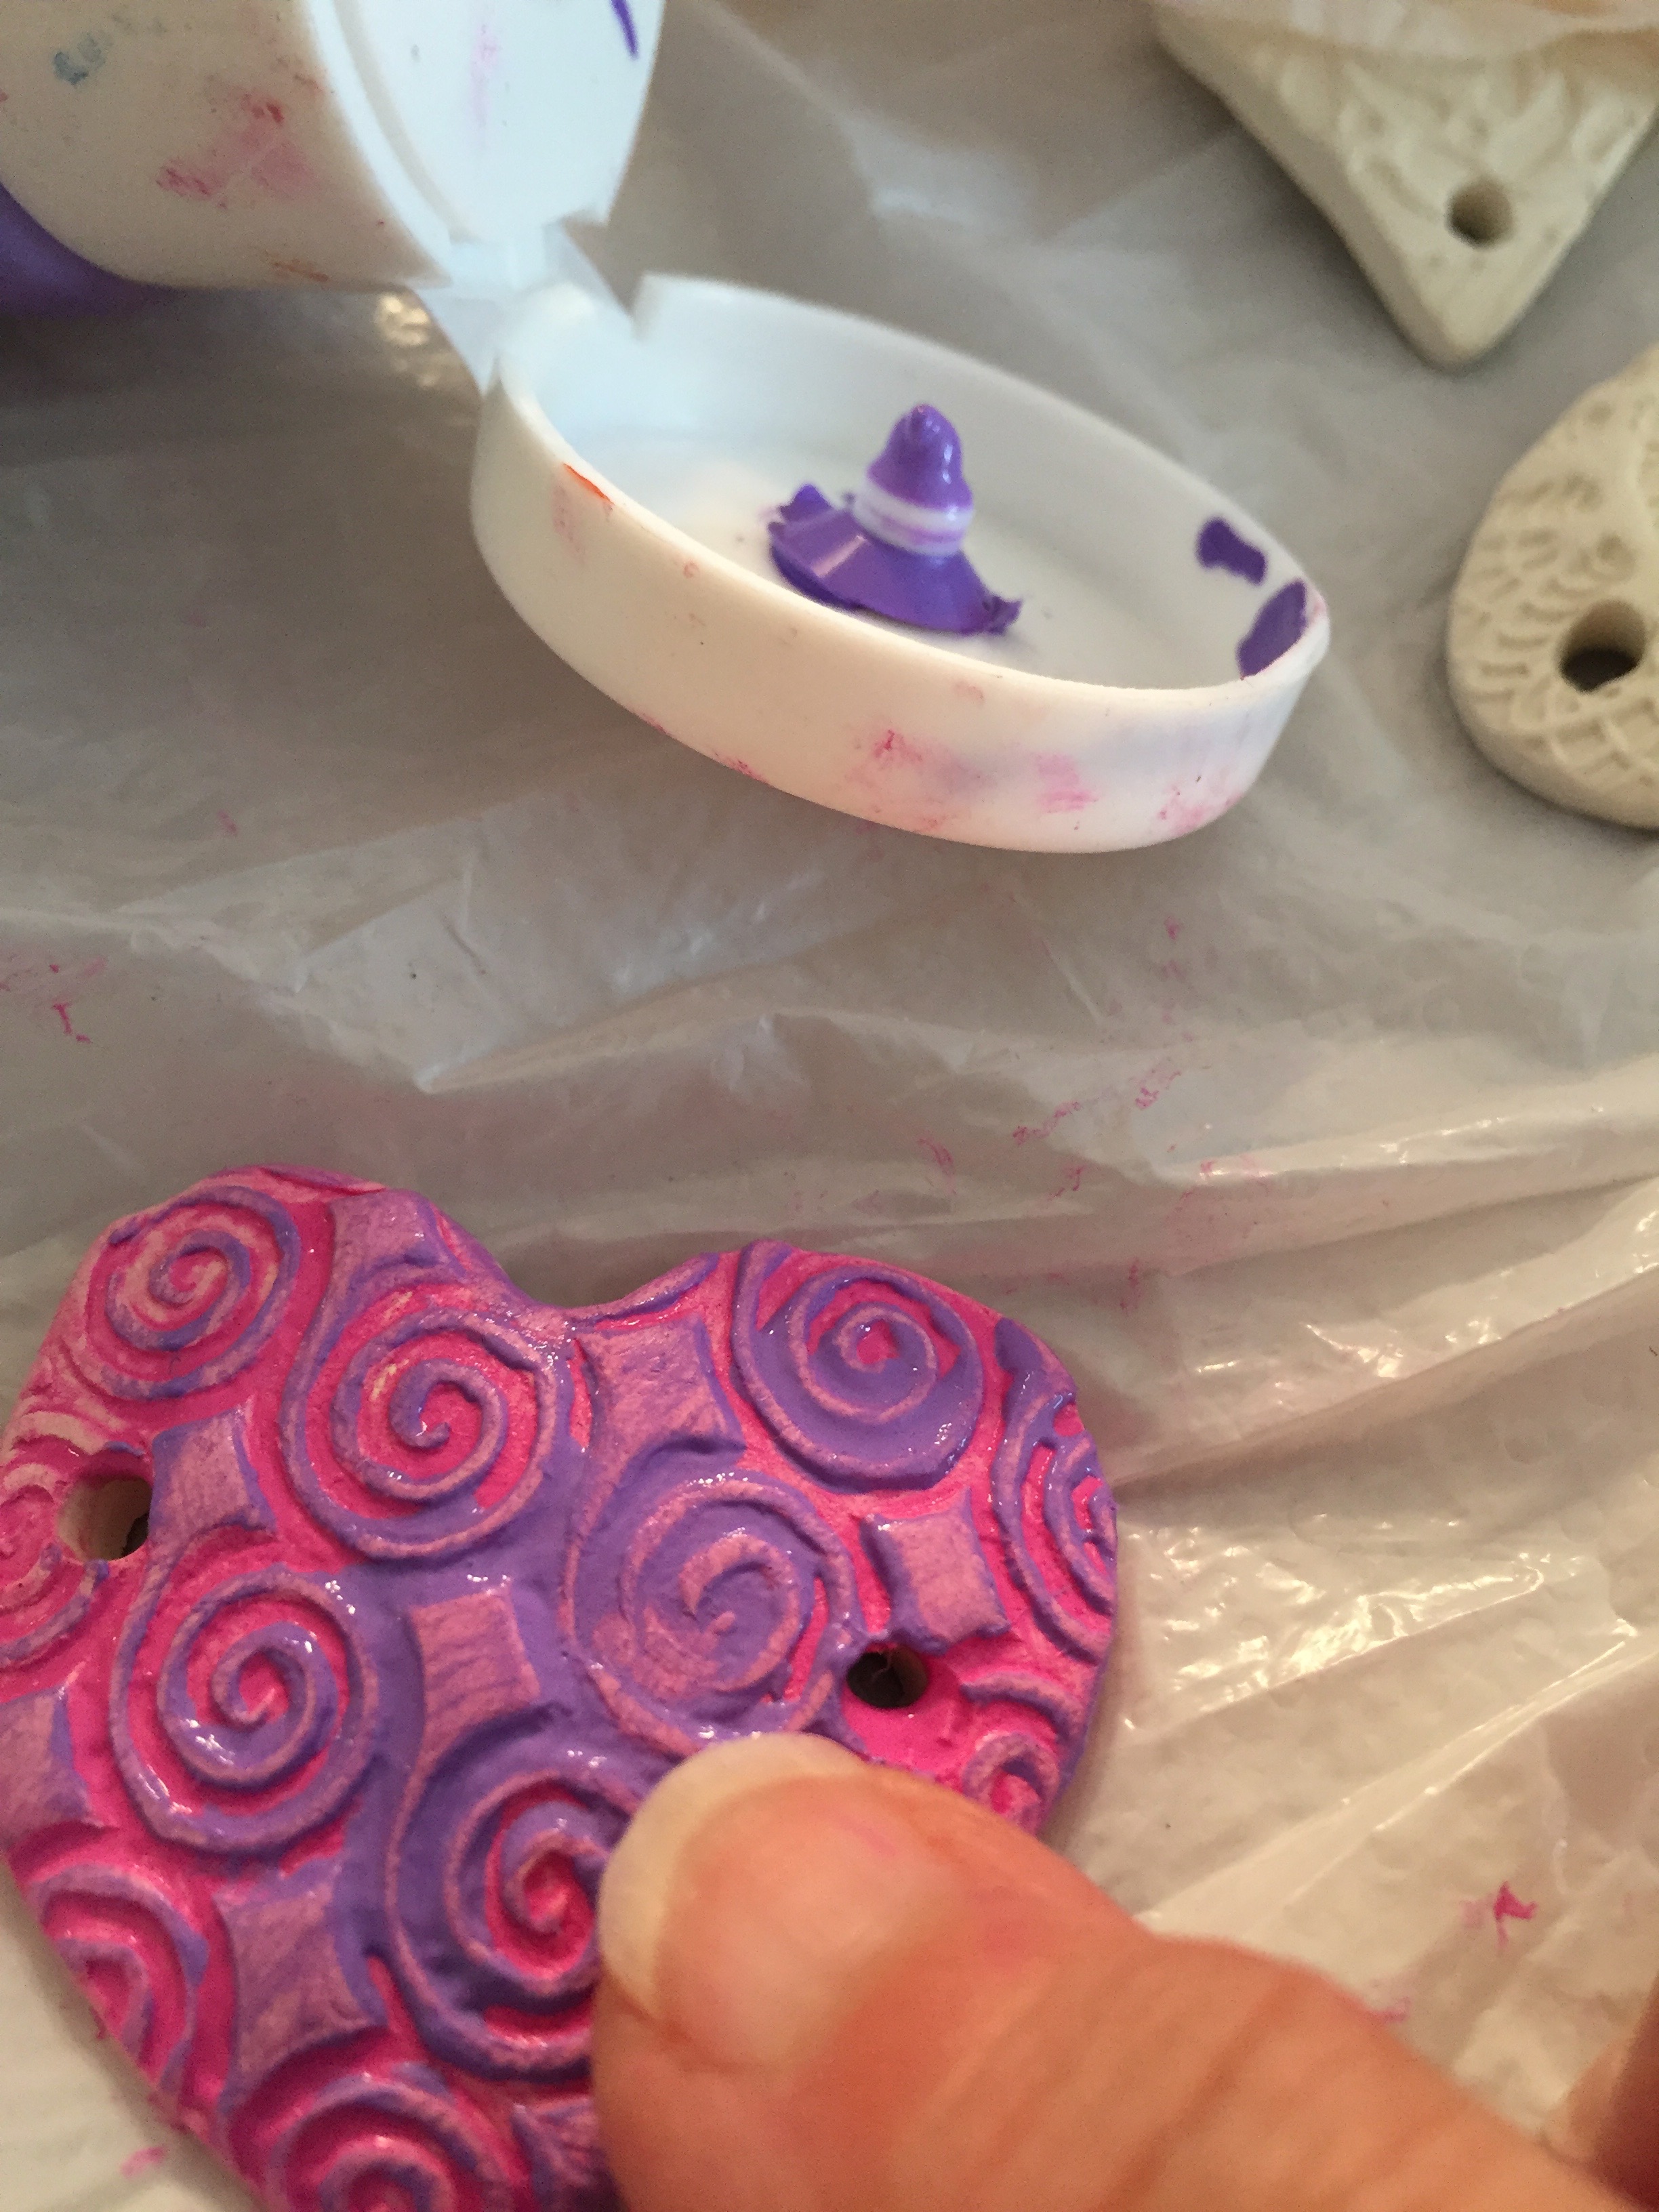
Next, a second layer of color is used to add interest to the surface. More wiping and paint application will embellish and highlight the textures. I end up using several complementary colors on one piece.

Metallic wax is another material that lends itself to this process. It adds a final sheen and a bit of glitz to the surface. It is rubbed on and rubbed off with a paper towel to get the final result.

As a fan of color, this method of decorating clay has been a fun exploration. It provides immediate gratification but changes the functionality of the piece and determines what I would make for this kind of situation. Think decorative rather than functional. I'd like to achieve this color blending method on my functional creations too, so I'm going to try to play with the underglazes I use to see if I can make that happen. I'll keep you posted!

Want to join in the fun? I'll be teaching a class at The Muse in Frederick, Md. on Wednesday, May 3! We will make a garden bell. I'll provide all the necessary supplies (including the bisqued, textured garden bell) and you'll do the painting! You'll go home with your very own creation. Click on this photo for class details.